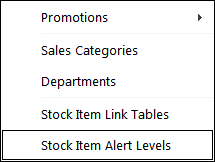
Adding alert level settings are configured by going to File > Sales > Stock Item Alert Levels.
A new window will open with a list of any existing alerts, and allowing you to Add, Delete or Modify.
Clicking on Add will open a new window allowing you to set the items you want to alert.
Choose your stock item by entering the Code in the field, or use the arrow to find your item from the Stock Item List.
If you want, you can also count down by using a Department.
You have a number of choices as to how you get the level of the item you want alerted.
By using Stock Level, this will go off the amount that POS has calculated left in your stock levels.
If you choose to, you can manually add an amount for items that are not stock controlled, but still have a count, like a Steak or special item that was bought from the markets.
It may also be an item you only want to sell at a special price until a certain quantity has been sold.
The next choice to make is the alert level itself.
Once the alert level has been reached, a message box will open every time the item is picked.
Departments are set the same way for department totals.
This is used when you do direct department sales.
When you press Save, the window will refresh so that you can add more items.
Once you have finished adding items, you exit out.
The items you have chosen to alert will be displayed in a list with the alert level you chose.
You can highlight any item and Modify and Delete it as you need.
If you require the item to be reset for each period, you will need to come back and Modify your alert level and Stock level remaining each time.
If you want the countdown to be visible to the staff at the POS Screen, you need to go to Setup > Yes/No Options > POS Screen > Tick Option “Show Alert Levels on Touchscreen Buttons”.
The countdown number will display in the bottom right corner of the button.